Orthopedic surgery demands more than a clean-looking cover. It requires a controlled, visible, and consistently protected sterile field. This guide explains how to drape a patient for orthopedic surgery correctly, from skin preparation and limb positioning to fenestration, adhesive edges, and intraoperative checks.
The World Health Organization’s Global Guidelines for the Prevention of Surgical Site Infection report that surgical-site infections affect approximately 11% of surgical patients in low- and middle-income countries. The CDC Guideline for the Prevention of Surgical Site Infection also emphasizes correct skin preparation, sterile barriers, and disciplined aseptic technique. AORN’s Guidelines for Perioperative Practice stress that sterile drapes must remain dry, intact, and properly positioned throughout the procedure.
Perioperative educator Cynthia Spry, RN, MA, CNOR, summarizes the practical mindset: “Draping is a process, not a single step.” That principle matters during total joint replacement, trauma fixation, and spine procedures. A folded drape may look perfect, yet a wet edge, exposed glove, or shifted extremity can compromise the field.
Small details matter.
The team should confirm the operative site, implants, positioning devices, and required drape configuration before opening supplies. The operative limb must remain supported without creating pressure points or obscuring circulation checks. Drapes should unfold away from the sterile field, without reaching across unsterile areas.
This guide is educational, not a substitute for facility policy, manufacturer instructions, or trained clinical judgment. Even experienced teams should pause and reassess. A sterile field is never “finished” once; it is protected continuously.
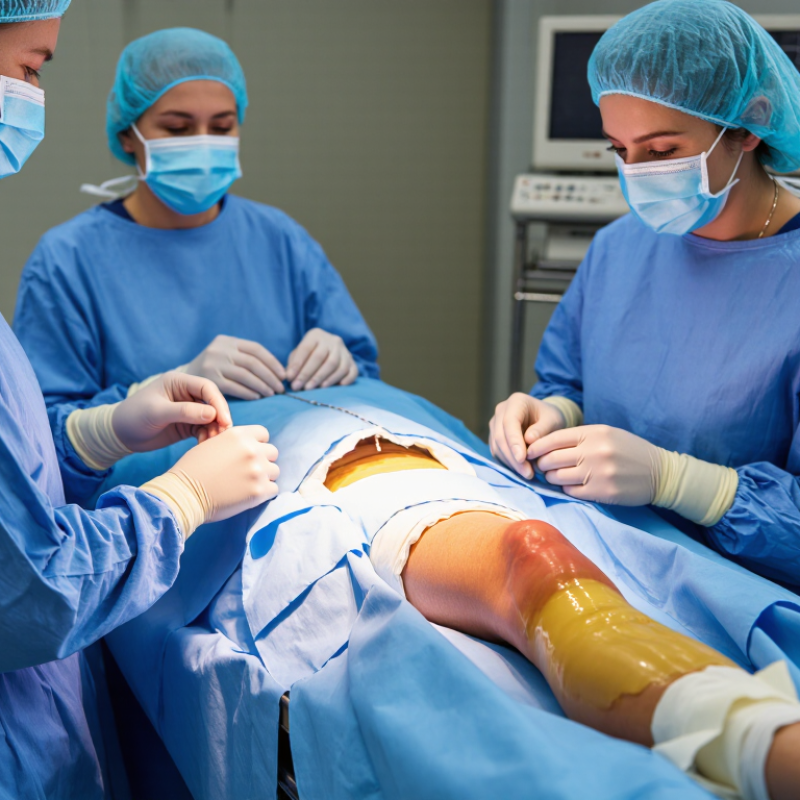
Orthopedic draping creates a sterile field around the operative site and protects the patient from unnecessary exposure. It also gives the surgical team clear access to the bone, joint, and nearby imaging area. Draping must follow the procedure, patient position, and facility protocol. A hip replacement needs different coverage from a hand or knee procedure.
Good draping begins with safe positioning and a dry skin preparation. The team should confirm the surgical site before placing sterile materials. Common supplies include sterile gowns and gloves, absorbent towels, a waterproof underpad, stockinette, elastic bandage, sterile sheets, fenestrated drapes, clamps, and a fluid collection pouch. Extra drapes should remain available. They may be needed when moisture, movement, or an unexpected incision changes the field.
The drape should move from the prepared area outward, without dragging contaminated edges across the skin. Keep the limb supported, visible to the surgeon, and free from excessive pressure. An adhesive edge can improve stability, but it should never replace careful monitoring. A neat field is not always a safe field. Wrinkles can press the skin, while hidden gaps can expose the operative area. Teams should check the tourniquet, cables, suction tubing, and imaging access after draping. Small details matter. Final checks should include patient comfort, breathing space, limb circulation, and unobstructed access for the entire procedure.
Patient preparation begins before the drape touches the skin. Confirm identity, procedure, laterality, allergies, implants, and imaging. Remove jewelry and inspect the skin for wounds or infection. Use approved antiseptic preparation, then allow the area to dry completely. Wet solution under a drape can increase risks.
The World Health Organization’s Surgical Safety Checklist study reported complications falling from 11.0% to 7.0% after checklist use. This supports careful preparation, although draping alone cannot create safety.
Position the patient to protect nerves, eyes, heels, and pressure points. Keep the operative limb stable, visible, and accessible for imaging. Expose enough skin for the incision, extension, and possible drain placement. Avoid excessive exposure, which can increase heat loss and contamination risk. Secure cables and tubing away from the sterile field.
The field should look calm.
Tips:
Mark laterality before preparation. Use a wide, dry sterile field. Keep fenestration centered over the planned incision. Do not stretch drapes across unstable equipment. Watch the edges during repositioning. Experienced teams still make small errors. A quick pause can catch them.
The CDC’s National Healthcare Safety Network emphasizes standardized surveillance for surgical-site infections, but local rates and procedures differ. Review hospital data and revise the draping method when practice shows weak points.
Before opening the sterile pack, confirm the patient, procedure, operative side, and positioning plan. Inspect the package for moisture, tears, or damaged seals. Perform hand hygiene and wear sterile gloves according to facility protocol. Expose only the prepared surgical site, while keeping the patient warm and properly covered.
Unfold the drape away from the operative field, allowing the sterile surface to remain untouched. Place the fenestrated drape over the site without sliding it across the skin. Smooth the material gently, avoiding pressure on bony areas, joints, or fixation devices. Secure the edges with approved sterile adhesive strips when needed. Keep suction tubing, cables, and irrigation lines organized beneath or beside the drape.
Small details matter. Check that the opening fully surrounds the incision area. Confirm that the drape does not restrict circulation or interfere with limb movement. A trained assistant should help control large drapes and prevent contact with nonsterile surfaces. I have seen experienced teams pause after positioning because an exposed corner was easy to miss. That pause is useful. If the drape shifts, becomes wet, or touches a nonsterile surface, stop and follow the facility’s corrective protocol. Document unusual skin reactions, pressure concerns, or positioning difficulties after the procedure.
Maintaining sterility during orthopedic surgery begins before the first drape touches the skin. Confirm the patient’s identity, procedure, implant side, and required exposure. Surgical skin preparation must dry fully. Moisture can weaken adhesion and encourage fluid tracking beneath the drape. The World Health Organization reports that surgical site infections affect about 11% of patients in low- and middle-income countries. That figure makes small preparation errors worth serious attention.
Use a wide fenestrated drape without stretching it across the operative field. Place adhesive edges smoothly, but never press contaminated gloves onto the sterile surface. Keep tubing, cables, and suction lines organized before incision. If a drape shifts, stop and assess the sterile boundary. Do not pull it back casually. Covering the area may be safer than repositioning it, depending on the exposure and facility protocol. A clean-looking fold can still hide a breach.
During joint replacement or fracture fixation, staff should watch the lower edges, limb holders, and fluid collection zones. The CDC guideline recommends limiting unnecessary traffic and maintaining strict aseptic technique throughout the procedure. Yet real rooms are imperfect. A rushed adjustment happens. I have seen teams focus on the incision while ignoring a loosened corner near the table edge. That detail deserves reflection. Document any suspected contamination, replace compromised materials promptly, and follow the surgeon’s and infection prevention team’s judgment.
China Top Orthopedic Draping Guide: How to Drape a Patient?
Common draping errors often begin before the first incision. Staff may touch the sterile drape with nonsterile gloves, stretch it across the patient, or expose skin near the operative field. A fenestration placed too low can force repeated adjustments. That movement increases contamination risk. The WHO Global Guidelines for Surgical Site Infection Prevention report that surgical site infections affect up to 11% of surgical patients in low- and middle-income countries. Draping is only one factor, but small breaches matter.
Safe removal needs the same discipline as application. Wear appropriate gloves, protect the wound, and remove adhesive edges slowly. Pull the drape away from the incision, not across it. Roll the contaminated surface inward. Do not shake the material or drag it over cables, instruments, or clean areas. A second staff member should control tubing and drains. Sharp items must enter approved sharps containers, never the drape bundle.
Inspect the patient’s skin after removal. Orthopedic adhesives can leave redness, pressure marks, or hidden moisture. Document unusual findings and report any suspected contamination promptly. A rushed team may skip this check. That is a preventable weakness. AORN perioperative guidance emphasizes maintaining sterile technique, controlled handling, and continuous team communication throughout the procedure. Local policy and clinician judgment must guide every case.
Confirm the patient, procedure, operative side, and required exposure. Let the skin preparation dry completely. Moisture can weaken adhesion.
Use a wide fenestrated drape without stretching it across the operative field. Smooth the adhesive edges gently. Avoid wrinkles near the opening.
Stop and assess the sterile boundary. Do not pull it back casually. Covering the area may be safer, depending on exposure and facility protocol.
Watch lower drape edges, limb holders, and fluid collection zones. Check corners near the table edge. A clean-looking fold may hide contamination.
Organize tubing, cables, and suction lines before incision. Limit unnecessary movement around the operating table. Keep nonsterile gloves away from sterile surfaces.
Common errors include touching drapes with nonsterile gloves and exposing nearby skin. A low fenestration can cause repeated adjustments. That movement increases risk.
Protect the wound and wear appropriate gloves. Remove adhesive edges slowly, pulling away from the incision. Roll the contaminated surface inward.
Check for redness, pressure marks, adhesive residue, and hidden moisture. Control tubing and drains during removal. Document unusual findings or suspected contamination promptly.
This guide explains how to drape a patient for orthopedic surgery correctly by combining careful preparation, proper positioning, and strict sterile technique. It introduces the purpose of orthopedic draping, the principles of maintaining a controlled sterile field, and the essential supplies needed before surgery begins. The patient should be identified, assessed, positioned safely, and prepared so that the surgical site is fully exposed while surrounding areas remain protected and covered.
The guide also outlines a practical sequence for applying drapes, including handling materials without contaminating them, securing the drapes, and preserving visibility and access throughout the procedure. It highlights how to manage necessary adjustments without breaking sterility, recognize common errors such as inadequate coverage or unnecessary movement, and remove drapes safely after surgery while protecting the patient and staff. All steps should be adapted to the procedure, facility protocols, and the instructions of the qualified surgical team.

NW Medical